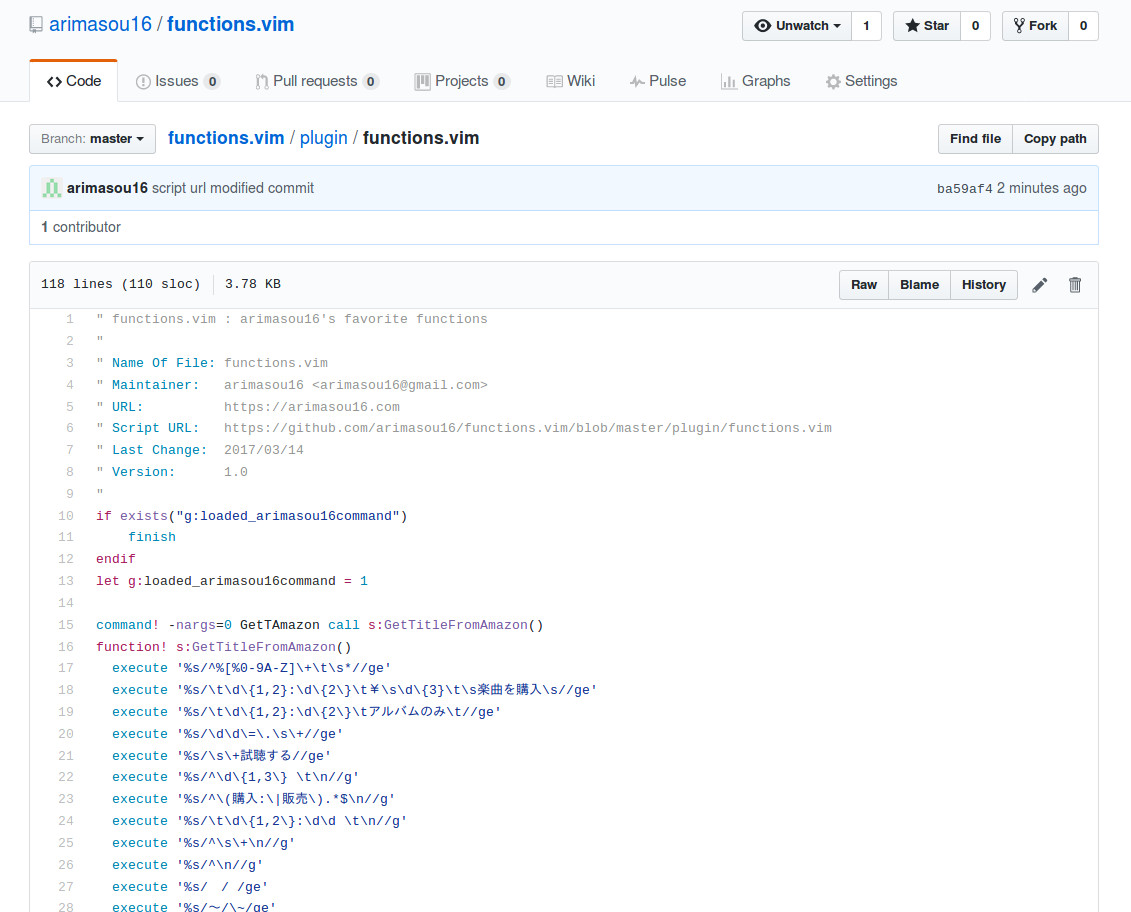
今まで、vim scriptで書いたものはsource example.vimといった具合で読みこませて、処理させていた。functionでの作り方をよく分からなかったからなのだけど、今回、作成してみた。
参考にしたのは
など。感謝。
%s/^%[%0-9A-Z]\+\t\s*//ge
%s/\t\d\{1,2}:\d\{2\}\t¥\s\d\{3}\t\s楽曲を購入\s//ge
%s/\t\d\{1,2}:\d\{2\}\tアルバムのみ\t//ge
%s/\d\d\=\.\s\+//ge
%s/\s\+試聴する//ge
%s/^\d\{1,3\} \t\n//g
%s/^\(購入:\|販売\).*$\n//g
%s/\t\d\{1,2\}:\d\d \t\n//g
%s/^\s\+\n//g
%s/^\n//g
%s/ / /ge
%s/~/\~/ge
%s/〜/\~/ge
%s//\~/ge
%s/“/"/ge
%s/’/'/ge
%!nkf -Z0
%s/\(\S\)\([(\-\[].\+[)\-\]]\)\@=/\1 /ge
%s/\s\+$//ge
%s/^\s\+//ge
といったのを、以下のような形にしてファンクション名とそれを呼び出すコマンド名を付けただけ。今更ながらシングルコーテーション'のエスケープは''と、シングルコーテーション二つと知った。
command! -nargs=0 GetTAmazon call s:GetTitleFromAmazon()
function! s:GetTitleFromAmazon()
  execute '%s/^%[%0-9A-Z]\+\t\s*//ge'
  execute '%s/\t\d\{1,2}:\d\{2\}\t¥\s\d\{3}\t\s楽曲を購入\s//ge'
  execute '%s/\t\d\{1,2}:\d\{2\}\tアルバムのみ\t//ge'
  execute '%s/\d\d\=\.\s\+//ge'
  execute '%s/\s\+試聴する//ge'
  execute '%s/^\d\{1,3\} \t\n//g'
  execute '%s/^\(購入:\|販売\).*$\n//g'
  execute '%s/\t\d\{1,2\}:\d\d \t\n//g'
  execute '%s/^\s\+\n//g'
  execute '%s/^\n//g'
  execute '%s/ / /ge'
  execute '%s/~/\~/ge'
  execute '%s/〜/\~/ge'
  execute '%s//\~/ge'
  execute '%s/“/"/ge'
  execute '%s/’/''/ge'
  execute '%!nkf -Z0'
  execute '%s/\(\S\)\([(\-\[].\+[)\-\]]\)\@=/\1 /ge'
  execute '%s/\s\+$//ge'
  execute '%s/^\s\+//ge'
endfunction
これ( functions.vim)を~/.vim/plugin/配下に置けば、めでたくso function.vimなんてやらなくてもGetTAmazonと入力することでvim scriptを実行することができる。
で、どうせなら、githubに晒しものにして、neobundleでインストールさせたい。
githubで新レポジトリ名(vimファイル名)で作成。
ローカルで新レポジトリ名と同じディレクトリを作成して、その配下に pluginディレクトリを作成する。そして、その pluginディレクトリ配下にvimファイルを配置する。
そして、新レポジトリにREADME.mdとディレクトリごと追加する。
arimasou16@Lemur:~/git/functions.vim$ echo "# functions.vim" >> README.md
arimasou16@Lemur:~/git/functions.vim$ git init
Initialized empty Git repository in /home/arimasou16/git/functions.vim/.git/
arimasou16@Lemur:~/git/functions.vim$ git add README.md plugin
arimasou16@Lemur:~/git/functions.vim$ git commit -m "first commit"
[master (root-commit) 4231c88] first commit
 2 files changed, 118 insertions(+)
 create mode 100644 README.md
 create mode 100644 plugin/functions.vim
arimasou16@Lemur:~/git/functions.vim$ git remote set-url origin github:arimasou16/functions.vim.git
arimasou16@Lemur:~/git/functions.vim$ git push -u origin master
Counting objects: 5, done.
Delta compression using up to 4 threads.
Compressing objects: 100% (3/3), done.
Writing objects: 100% (5/5), 1.65 KiB | 0 bytes/s, done.
Total 5 (delta 0), reused 0 (delta 0)
To github:arimasou16/functions.vim.git
 * [new branch]      master -> master
Branch master set up to track remote branch master from origin.
arimasou16@Lemur:~/git/functions.vim$
git remote set-url origin github:arimasou16/functions.vim.gitと github: としているのは、~/.ssh/configで以下のように設定してgithubと秘密鍵で接続するようにしているから。
Host github
    HostName github.com
    IdentityFile id_rsa
    User git
    Port 22
git remote add origin git@github.com:arimasou16/functions.vim.gitとすると、以下のように怒られる。
arimasou16@Lemur:~/git/functions.vim$ git remote add origin git@github.com:arimasou16/functions.vim.git
arimasou16@Lemur:~/git/functions.vim$ git push -u origin master
Permission denied (publickey).
fatal: Could not read from remote repository.

Please make sure you have the correct access rights
and the repository exists.
githubに公開できたら

NeoBundle 'arimasou16/functions.vim'と vimrcに記述すれば、自分の作成したファンクションが自宅で、はたまた仕事場で呼び出せるようになる。
今後はスクリプトを直しても、コミットしてプッシュしておけば、NeoBundleCheckUpdateすれば、他の環境でも即時反映される。
arimasou16@Lemur:~/git/functions.vim$ git commit -a -m "second commit"
[master a0a141c] second commit
 1 file changed, 15 insertions(+), 15 deletions(-)
arimasou16@Lemur:~/git/functions.vim$ git push -u origin master
Counting objects: 4, done.
Delta compression using up to 4 threads.
Compressing objects: 100% (3/3), done.
Writing objects: 100% (4/4), 584 bytes | 0 bytes/s, done.
Total 4 (delta 1), reused 0 (delta 0)
remote: Resolving deltas: 100% (1/1), completed with 1 local objects.
To github:arimasou16/functions.vim.git
   4231c88..a0a141c  master -> master
Branch master set up to track remote branch master from origin.
arimasou16@Lemur:~/git/functions.vim$
今後も良きvimライフを送れる。